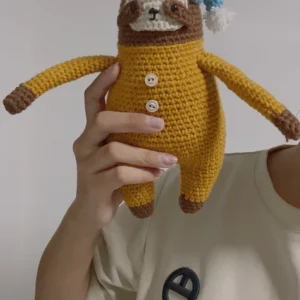
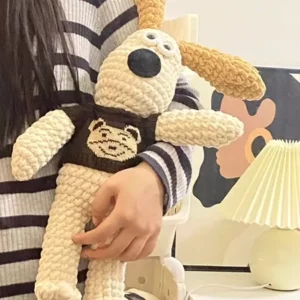
[Finished product] Mr. Bean’s Teddy Bear Plush Crochet Toy
$17.90
Description
how to crochet Mr. Bean’s Teddy Bear – crochet guides, tutorial and patterns
Crocheting a small version of Mr. Bean’s Teddy Bear is a fun and nostalgic project. Mr. Bean’s teddy bear is simple in design but has distinct features like long limbs and a basic facial expression. This amigurumi version is designed to be small and keychain-sized, making it a great accessory or gift.
Materials:
- Yarn:
- Brown or dark brown (for the body)
- Black (for eyes, nose, and mouth)
- Crochet hook: 2.0mm – 3.0mm (depending on the yarn and size you prefer)
- Stuffing: Polyester fiberfill
- Yarn needle
- Stitch markers
- Scissors
- Safety eyes: 6mm or 8mm (optional)
- Black felt (optional for eyes and nose)
Crochet Stitches Used:
- ch: Chain
- sc: Single crochet
- inc: Increase (2 sc in the same stitch)
- dec: Decrease (single crochet 2 stitches together)
- sl st: Slip stitch
- MR: Magic ring
Crochet Pattern: Mr. Bean’s Teddy Bear
1. Head (Brown Yarn)
- Round 1: Magic ring, 6 sc into the ring (6).
- Round 2: 2 sc in each stitch (12).
- Round 3: 1 sc, inc around (18).
- Round 4: 2 sc, inc around (24).
- Rounds 5-9: Sc around (24).
Stuff the head lightly.
- Round 10: 2 sc, dec around (18).
- Round 11: 1 sc, dec around (12).
- Round 12: Dec around (6), fasten off.
Close the hole and leave a long tail for sewing.
2. Body (Brown Yarn)
- Round 1: Magic ring, 6 sc into the ring (6).
- Round 2: 2 sc in each stitch (12).
- Round 3: 1 sc, inc around (18).
- Rounds 4-7: Sc around (18).
Stuff the body.
- Round 8: 1 sc, dec around (12).
- Round 9: Dec around (6), fasten off.
Leave a long tail for sewing and attach the body to the head.
3. Arms (Make 2, Brown Yarn)
- Round 1: Magic ring, 6 sc into the ring (6).
- Rounds 2-5: Sc around (6).
Fasten off, leaving a long tail for sewing. Lightly stuff and sew the arms onto the sides of the body, about halfway down.
4. Legs (Make 2, Brown Yarn)
- Round 1: Magic ring, 6 sc into the ring (6).
- Rounds 2-6: Sc around (6).
Fasten off, leaving a tail for sewing. Lightly stuff and sew the legs to the bottom of the body.
5. Ears (Make 2, Brown Yarn)
- Round 1: Magic ring, 6 sc into the ring (6).
Fasten off, leaving a long tail for sewing. Flatten the ears and attach them to the top of the head, spaced evenly apart.
6. Face (Black Yarn or Felt)
- Eyes:
- If using safety eyes, place them between Rounds 5 and 6 of the head, spaced evenly.
- If embroidering the eyes, stitch small round eyes using black yarn or black felt circles.
- Nose:
- Embroider an oval-shaped nose with black yarn or attach a small oval-shaped piece of black felt in the center of the face.
- Mouth:
- Stitch a straight line or slight curve for a simple mouth with black yarn, just below the nose.
Assembly:
- Attach the Head and Body: Sew the head to the body securely.
- Attach the Arms and Legs: Position the arms and legs symmetrically on the body, ensuring they are evenly spaced.
- Attach the Ears: Sew the ears to the top of the head.
- Add the Face Details: Embroider or attach the eyes, nose, and mouth.
Optional Keychain Addition:
- If you want to make the bear into a keychain, attach a keychain ring to the top of the head or between the ears.
Now you have your own Mr. Bean’s Teddy Bear amigurumi! This mini crochet project is perfect for keychains, small gifts, or simply to carry around as a cute reminder of the iconic teddy bear from the Mr. Bean series.
Related products
-


[Finished product] Mr. Sloth Crochet Doll Keychain
$35.39 Add to cart -


[Finished product] Handmade Crochet Cute Plush Gatekeeper Dog
$32.57 Add to cart -

[Finished product] Crochet Cow with Stand
$26.93 Add to cart -
 Sale!
Sale!

[Finished Product] Handmade Crochet Amigurumi Little Dinosaur
$26.93Original price was: $26.93.$24.99Current price is: $24.99. Add to cart


