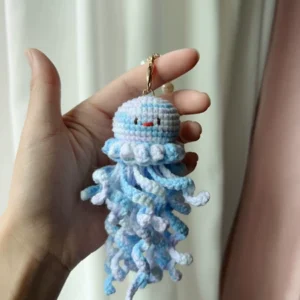
[Finished product] Handmade Crochet Dinosaur, Perfect Gift for Babies, Besties, or Friends
$24.67
Description
how to Crochet a cute Dinosaur – crochet tutorial, guides and patterns
Crocheting a cute dinosaur is a fun project that’s sure to create an adorable toy! Here’s a step-by-step guide to help you crochet your cute little dinosaur:
Materials Needed:
- Yarn: Light green (for the body), dark green or another contrasting color (for the spikes).
- Crochet hook: 2.5mm-3.5mm (depending on your yarn weight).
- Safety eyes: 6-8mm (or use black yarn to embroider eyes).
- Polyester fiberfill for stuffing.
- Yarn needle for sewing and weaving in ends.
- Stitch markers (optional, to mark the beginning of rounds).
Abbreviations:
- ch: Chain
- sc: Single crochet
- inc: Increase (2 sc in one stitch)
- dec: Decrease (sc two stitches together)
- sl st: Slip stitch
- MR: Magic ring
- FO: Fasten off
Body and Head (Worked in Continuous Rounds)
Round 1:
- Start with light green yarn. Make a magic ring and sc 6 into the ring (6).
Round 2:
- Inc in each stitch (12).
Round 3:
- 1 sc, inc around (18).
Round 4:
- 2 sc, inc around (24).
Rounds 5-10:
- Sc around (24) for 6 rounds to build the body and head shape.
Round 11:
- 2 sc, dec around (18).
Round 12:
- 1 sc, dec around (12). Start stuffing the body.
Round 13:
- Dec around (6). Finish stuffing the body.
Fasten off, weave in the end, and leave a long tail to sew the head and body closed.
Arms (Make 2)
Round 1:
- Using light green yarn, make a magic ring and sc 6 into the ring (6).
Round 2:
- Inc in each stitch (12).
Rounds 3-5:
- Sc around (12) for 3 rounds.
Fasten off and lightly stuff the arms. Leave a long tail for sewing and attach them to the sides of the dinosaur’s body.
Legs (Make 2)
Round 1:
- Using light green yarn, make a magic ring and sc 6 into the ring (6).
Round 2:
- Inc in each stitch (12).
Rounds 3-6:
- Sc around (12) for 4 rounds.
Fasten off and lightly stuff the legs. Leave a long tail for sewing. Sew the legs to the bottom of the dinosaur’s body.
Tail
Round 1:
- Using light green yarn, make a magic ring and sc 6 into the ring (6).
Round 2:
- 1 sc, inc around (9).
Rounds 3-6:
- Sc around (9) for 4 rounds.
Round 7:
- 1 sc, dec around (6).
Fasten off, stuff lightly, and leave a long tail for sewing. Sew the tail to the back of the dinosaur.
Spikes (Make 4-5 Depending on Size of Your Dinosaur)
Step 1:
- Using a contrasting yarn color (dark green or other), ch 3.
Step 2:
- Sc in the 2nd chain from hook, sc in next (2).
Step 3:
- Ch 1, turn. Sc in each stitch across (2).
Step 4:
- Ch 1, turn. Dec (1).
Fasten off, leave a long tail for sewing. Attach these spikes along the back of the dinosaur, starting from the top of the head to the tail.
Face Details
- Attach safety eyes between Rounds 5 and 6 on the head.
- Nose: Using black yarn or embroidery thread, stitch two small lines on the snout for nostrils.
- Smile: Embroider a small smile underneath the nose with black thread or yarn.
Conclusion:
Your cute dinosaur amigurumi is complete! This dinosaur makes a great toy, decoration, or gift for dinosaur lovers of all ages. Feel free to customize it by using different colors or adding other embellishments. Happy crocheting! 🦕


